Gum bichromate printing is a hand-coated photographic printing process in which pigmented gum arabic is made photosensitive with a dichromate salt, contact-printed under UV through a large-format negative, and developed in plain water. The image that remains on the paper is a pigment image — physically opaque pigment particles locked into a hardened gum matrix — whose color, tonal range, and surface texture are chosen layer by layer by the practitioner. It is one of the oldest continuously-practiced alternative photographic processes, and one of the most expressive.
When to reach for it
Gum suits photographers who want artisanal prints with visible texture and dimensional character; color control through direct pigment choice rather than chromogenic dye systems; durability measured in centuries (pigment images outlast most photographic print processes when lightfast pigments are used); or hybrid workflows pairing gum with cyanotype or platinum as a foundation layer. It is not the right tool when maximum spatial resolution matters (pigment-image resolution is limited by pigment particle size — typically 10–100 micrometers, coarser than silver grain), when workflow time matters (a single monochrome print is a 1–2 day cycle; tricolor can span a week), or when consistent batch reproducibility matters (hand-coating is inherently variable, and practitioners generally embrace this).
A brief history
The underlying dichromate-tanning chemistry was discovered by Alphonse Poitevin in 1855, and John Pouncy adapted it to gum-pigment photographic printing in 1858. The process was largely dormant in mainstream practice until Rouillé-Ladevèze's 1894 Paris exhibition reintroduced it as an artistic medium

, after which it was embraced by the Pictorialist movement through the early 20th century — Demachy, Puyo, Steichen, and the American members of the Photo-Secession

used it as a deliberate alternative to the mechanical uniformity of silver-gelatin. It fell out of mainstream practice as modernism displaced Pictorialism in the 1920s–1930s and as chromogenic color processes matured mid-century. A sustained revival began in the 1970s and continues; Christina Z. Anderson's Gum Printing (2016) is the current standard reference, and William Crawford's The Keepers of Light (1979) remains the canonical historical-and-working guide to the process and its era[1].
How it works
The image-forming mechanism is dichromate tanning.
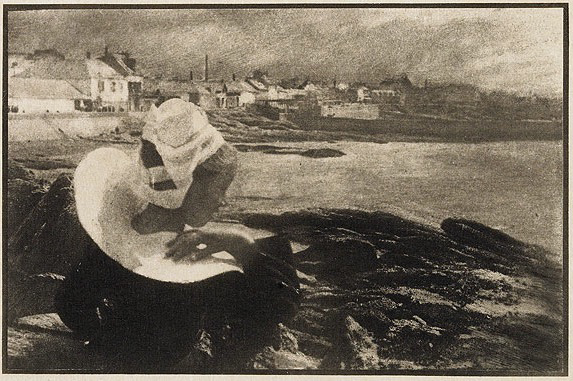
A mixture of gum arabic, pigment, and a dichromate salt (ammonium or potassium dichromate) is brushed onto paper. Where UV light reaches the coating, the dichromate photochemically reduces from Cr(VI) to Cr(III), which cross-links the gum arabic into a water-insoluble matrix — trapping the pigment particles in place. Where UV is blocked by the dense parts of the negative, the coating remains water-soluble. In development, the unexposed coating dissolves in plain water, washing away both gum and its pigment load and leaving a positive pigment image wherever exposure was adequate.
Because the image is formed of pigment particles rather than silver grains, dye molecules, or metal atoms, gum prints have a distinctive soft resolution and a subtle three-dimensional quality visible in raking light. The deepest shadows are smooth bare paper; the highlights are the thickest deposits of hardened pigmented gel. This is a feature of the process, not a defect.
The dichromate chemistry used here is the same mechanism that drives carbon transfer, carbro, and bromoil prints — so learning gum is partly learning a family of related processes.
Materials
Sensitizer. Ammonium dichromate (saturated ~28% in water) is the contemporary default — it's the most photoactive of the dichromate salts and gives the most exposure latitude. Potassium dichromate (saturated ~12%) is the historical traditional choice and remains common. Both are serious hazards; see the safety section below and the full treatments on potassium dichromate and ammonium dichromate on the sister site.
Colloid. Gum arabic as a 14° Baumé aqueous solution (~35% w/w) — available pre-mixed from alt-process suppliers like Photographers' Formulary or Bostick & Sullivan, or compounded from food-grade acacia-gum powder.
Pigment. Artist-grade watercolor (tube or pan) or dry pigments dispersed directly into the gum. Pigment choice determines image color, density range, and lightfastness — a lampblack or Mars black gives a deep neutral monochrome; iron oxides and earth pigments give warm tones; quinacridones and phthalocyanines give saturated modern colors with good lightfastness. This is an artistic choice, not a recipe to be copied.
Paper. Heavy cotton-rag watercolor paper — Arches Platine, Fabriano Artistico, Lanaquarelle, or Arches Aquarelle are common choices, with hot-press surfaces for smoother work and cold-press or rough for more texture. The paper must be pre-shrunk before first coating (soak 30 min at 40 °C, dry flat) and often sized with hardened gelatin or a glyoxal-cross-linked PVA to prevent the dichromate from staining the paper base in unexposed areas.
Negatives. Gum is a slow contact-printing process; the negative must be the same size as the final print. Two paths converge in current practice: traditional large-format film negatives (4×5, 8×10, or larger), or digital negatives inkjet-printed on transparency film (Pictorico OHP or similar) from a digital positive inverted to the density curve gum requires. Anderson's 2016 manual treats the digital path as an equal peer, not a fallback[2].
Workflow (monochrome, single layer)
The single-layer monochrome case is the right starting point for a new practitioner. Multi-color workflows repeat this cycle once per color, with careful registration between cycles.
- Prepare paper. Pre-shrink and dry flat. Optionally size with hardened gelatin or glyoxal/PVA.
- Mix emulsion. Combine roughly equal parts gum-arabic solution, pigment, and sensitizer. A typical starting ratio is one teaspoon of tube watercolor per 10 mL of gum solution, adjusted to taste.
- Coat. Brush a thin even layer across the image area with a hake or foam brush; smooth with a blending brush to eliminate streaks. Ordinary indoor light is fine during coating — dichromates are UV-sensitive, and most indoor fluorescent or LED lighting emits negligible UV. Anderson calls this the "dimroom" condition to distinguish it from a traditional darkroom.
- Dry. Horizontal, dust-free, at ambient humidity. Drying takes 20–60 minutes. Fresh-coated paper is more sensitive than stale-coated; standardize the drying time for repeatability.
- Expose. Place the negative emulsion-to-emulsion with the coated paper in a contact printing frame and expose to UV (sunlight, a UV bank, or a UV plate-burner) for minutes to tens of minutes. Test strips are essential — exposure depends on sensitizer concentration, pigment opacity, and UV intensity.
- Develop. Float face-down in a tray of plain cool water (18–22 °C). Unexposed coating slowly dissolves; exposed (hardened) coating remains. Development takes thirty minutes to several hours. The print emerges gradually.
- Rinse and dry. Brief rinse in running water, then dry flat.
Multi-color and hybrid workflows
To produce a color gum print, repeat the full coat-expose-develop cycle once per color layer. Monochrome is one cycle; duotone is two; tricolor (CMY) is three; quadcolor (CMYK, adding a black key layer for shadow depth) is four. Each cycle requires its own color-separated negative, and each cycle must land in register with the previous — which is where the registration discipline of multi-layer alt-process printing meets the real world of paper expansion under repeated wetting. Pre-shrinkage reduces (but does not eliminate) inter-cycle dimensional drift; registration pins and printed alignment crosshairs handle what remains.
Two hybrid processes are widely practiced and deserve specific mention. Gum over cyanotype builds gum layers on top of a cyanotype base

— the cyanotype provides sharp shadow detail and Prussian-blue shadow tones; the gum adds color, surface texture, and tonal modulation. It is the more accessible of the two hybrids because cyanotype sensitizer is cheap. Gum over platinum builds gum on top of a platinum or palladium image — the platinum provides the finest continuous tone of any print process; the gum modulates and colors it without losing the platinum's character. It is the more refined hybrid, also substantially more expensive.
For the underlying processes see cyanotype printing and platinum/palladium printing. Christopher James's Book of Alternative Photographic Processes provides the broadest cross-process context if you want to understand how gum relates to the full family of alt-process techniques[3].
Troubleshooting
The common failure modes and their usual causes, from Anderson's dedicated troubleshooting chapter[2]:
- Image washes off during development — under-exposure, or under-sized paper, or too-concentrated pigment. Increase exposure, improve sizing, reduce pigment loading.
- No tonal range; the image looks solid — over-exposure or over-sensitization. Reduce exposure time or dilute the sensitizer.
- Dichromate stain in the shadows — insufficient paper sizing, or too-concentrated sensitizer. Re-size the paper or dilute the sensitizer.
- Registration drift between layers — paper was not fully pre-shrunk, or humidity changed between cycles. Re-pre-shrink more aggressively and control room humidity.
- Coat lifts in flakes during development — the coat was too thick, or paper sizing failed.
- Highlights block up — paper sizing too heavy, or pigment too opaque in the emulsion. Reduce pigment loading.
Safety
Dichromate sensitizers are hazardous. Hexavalent chromium — the form of chromium in dichromate salts — is a known human carcinogen (IARC Group 1) and a skin and respiratory sensitizer. Wear nitrile gloves and eye protection when handling sensitizer concentrates; work in a ventilated area; do not create aerosols. Development-tray water contains unreduced Cr(VI) and must be disposed of as hazardous waste, not poured down the drain.
Full regulatory citations and hazard treatments live on the sister-site chemistry pages: potassium dichromate and ammonium dichromate. Practitioners concerned about Cr(VI) exposure — including pregnant practitioners and those with respiratory sensitivities — should consider a chromate-free alternative such as the DAS (diazidostilbene) sensitizer system, which Anderson covers as an optional variant.